Japanese Okonomiyaki recipe

For those who love Japanese food; you may already be familiar with Okonomiyaki (O-konomi-yaki). If not, it is a must try! This vegetarian Japanese Okonomiyaki recipe is something we’ve been wanting to try making at home for months.

Okonomiyaki is a Japanese savoury pancake containing a variety of ingredients. The name is derived from the word okonomi, meaning “what you like” or “what you want”, and yaki meaning “grilled” or “cooked”.

As the name insists, you can do what you like. But there are some differences in ingredients that change the style of the dish depending on the region of Japan. There are two main types of okonomiyaki. Osaka (or Kansai) style or Hiroshima. For us, it is all about the former style – Osaka, as this was the variety we “sampled” the most while travelling around Japan earlier this year. Our first attempt at making okonomiyaki was at a cooking class in Osaka called Eat Osaka which is well worth doing if you are ever in Osaka.

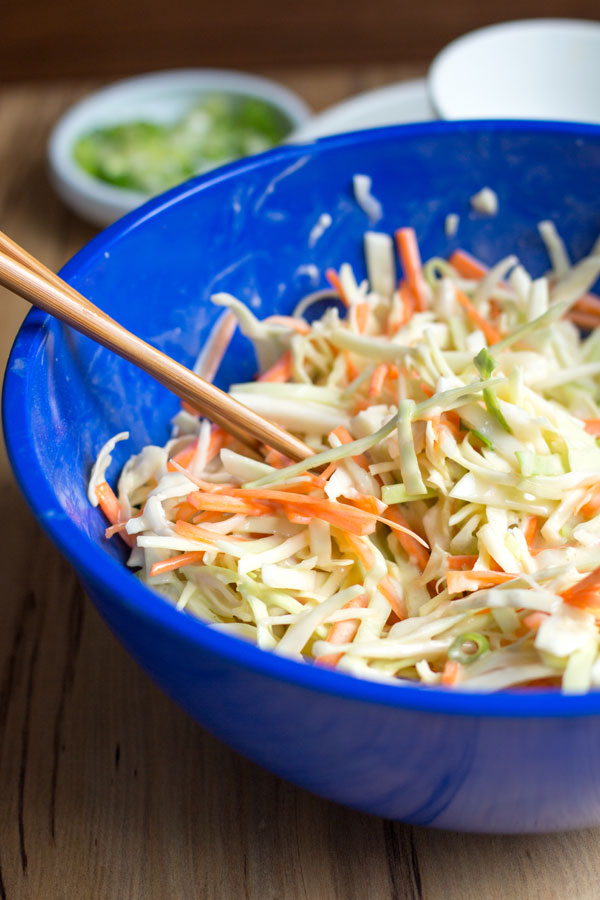
To make the okonomiyaki, it is a simple flour based mixture combining vegetables (predominantly cabbage) and if you want a non-vegetation option, you could add some cooked pork, chicken or prawns.

At a restaurant traditionally the Okonomiyaki is cooked on a hot plate in front of you, however, our homemade Okonomiyaki recipe can be cooked using a non-stick fry pan with a little vegetable oil.

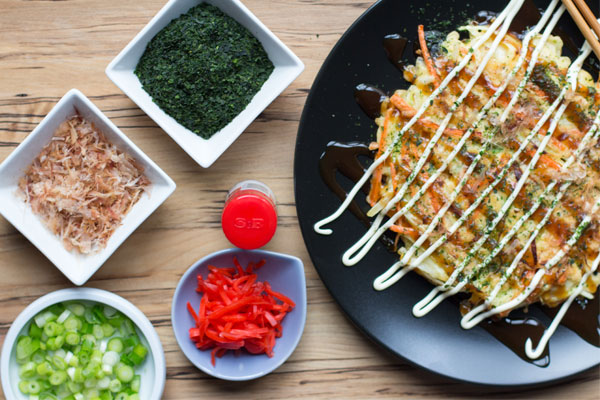
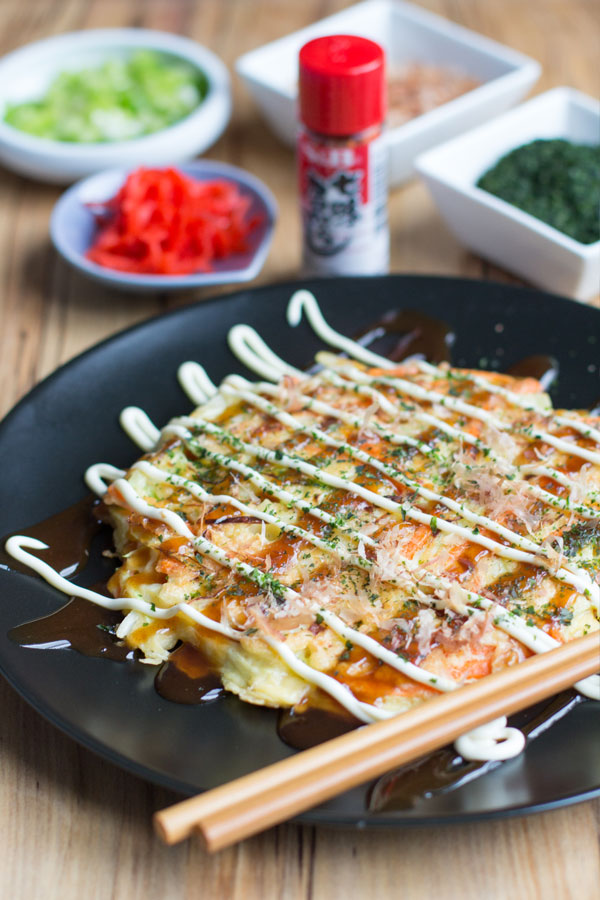
To finish your okonomiyaki the best part is the toppings! Okonomiyaki sauce is essential. It is a dark brown sauce combining Worcestershire sauce, soy sauce, ketchup, and a dash of sugar or a teaspoon of honey. The dominant okonomiyaki sauce brand is Otafuku. You then need to use Japanese mayonnaise; Kewpie Mayo is the most popular brand or any other Japanese mayo which is thicker and sweeter than other varieties. To finish, top off your okonomiyaki with Aonori; a green seaweed close to powder form and Dried Bonito Flakes (if you like). In our house, if you like a little spice, you can also use sriracha or some Nanami Togarashi (dried chilli powder)!

Looking for other vegetarian recipes then check out or vegetarian rice paper rolls.

Japanese Okonomiyaki ingredientsJapanese Okonomiyaki batterJapanese Okonomiyaki mixtureCooking Japanese Okonomiyaki RecipeOsaka Okonomiyaki RecipeJapanese Okonomiyaki RecipeHomemade Japanese Okonomiyaki RecipeJapanese Okonomiyaki Recipe

Vegetarian Japanese Okonomiyaki – Recipe Instructions

5.0 from 1 reviews
Japanese Okonomiyaki Recipe
 
Prep time
Cook time
Total time
 
Okonomiyaki is a Japanese savoury pancake containing a variety of ingredients. The name is derived from the word okonomi, meaning "what you like" or "what you want", and yaki meaning "grilled" or "cooked".
Author:
Recipe type: Main
Cuisine: Japanese
Serves: 4
Ingredients
Japanese Pancake mixture
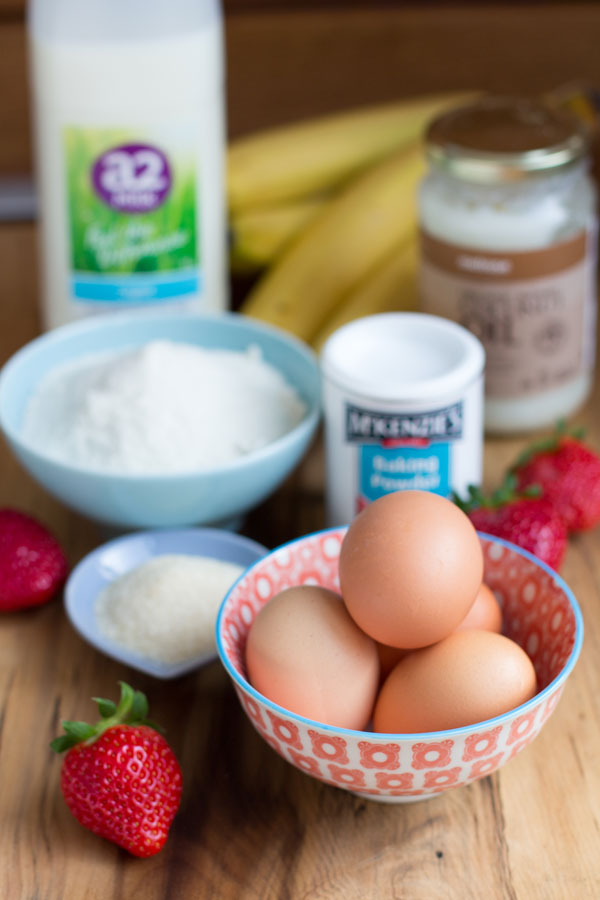
  • 120g Okonomiyaki flour or plain flour
  • ¾ cup water
  • 3 eggs, lightly beaten
  • 500g Cabbage, finely shredded
  • 1 carrot, grated or finely sliced
  • 4 Spring onions, sliced (half for recipe, half for decoration)
  • Vegetable oil
Toppings
  • Okonomiyaki Sauce
  • Japanese Mayonnaise
  • Aonori
  • Dried Bonito Flakes
  • Pickled Ginger
Instructions
  1. In a large bowl, whisk together flour and Water until smooth.
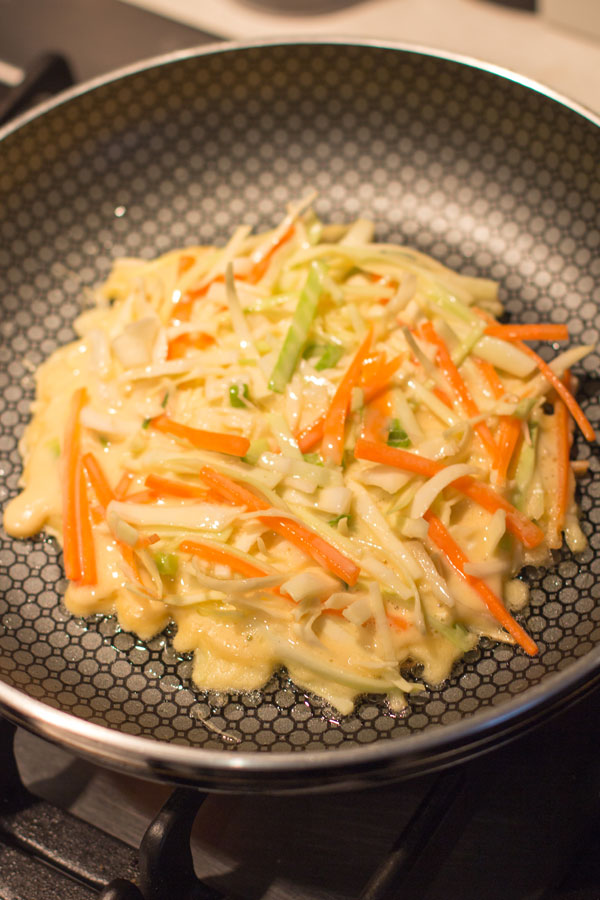
  2. Add the eggs to the batter and whisk to combine. Stir in the cabbage, carrot, and spring onions.
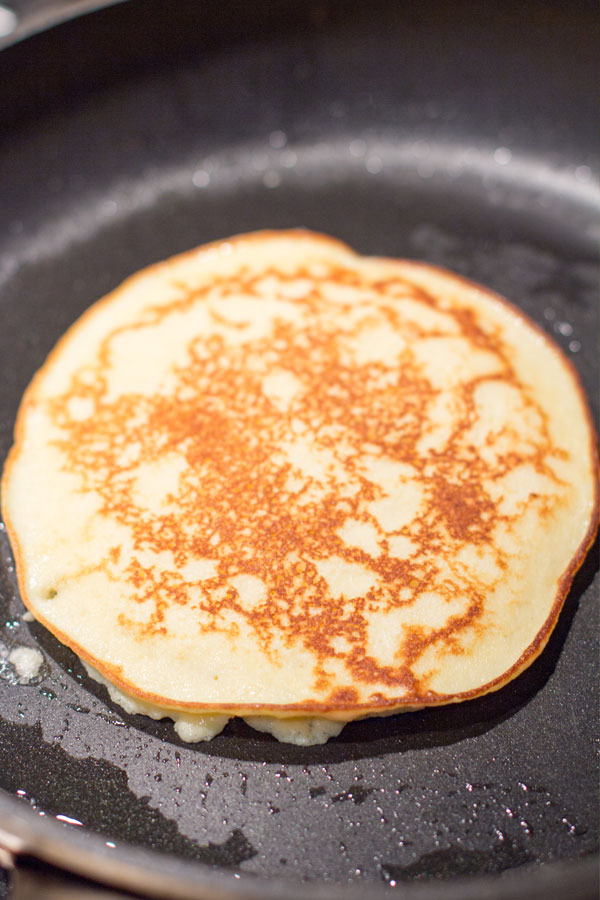
  3. Meanwhile, heat a non-stick frying pan over medium-high heat.
  4. Add Okonomiyaki mixture. Using a spatula and form pancakes until ½” thick and approximately (6”) across.
  5. After about 3 minutes, flip over pancake and cook for 4 minutes.
  6. Remove to plate and drizzle with Okonomiyaki sauce, Kewpie mayonnaise and sprinkle with Aonori and dried Benito flakes.


Banana pineapple smoothie recipe

As many readers would know Sunday is market day for Brooke and I. Each Sunday we venture to South Melbourne markets to do the weekly grocery shop. Brooke is a woman on a mission when doing the grocery shop, methodically checking the items off the list, whereas I’m frequently straying from the plan. This Sunday Brooke turned around to see me holding not one but 2 whole pineapples (which, were not on the list). Pre-empting the question coming my way I said, “I’m going to make a banana pineapple smoothie”.

On the ride home, I now needed to back that audacious statement up so I Googled healthy banana pineapple smoothie recipe. To my surprise, I couldn’t find any, which appealed so I decided to make a hybrid of a couple I had read.

This is a quick and tasty way to start your morning. Simply combine your 4 ingredients, fresh pineapple, half a banana, half a cup of Greek yogurt, and 1 cup of Almond coconut milk (either plain almond or coconut milk will also work). Add half a cup of ice and blend for 60 seconds and your tropical banana pineapple smoothie is ready to drink.

With no added sugar this sweet and tangy banana pineapple smoothie recipe is secretly healthy!

Looking for more great smoothie recipes then check out our healthy purple smoothie or our kale smoothie.

Healthy banana pineapple smoothie recipeBanana pineapple smoothie with Greek yogurtSkinny banana pineapple smoothie with yogurtBanana pineapple smoothie recipe

5.0 from 1 reviews
Banana pineapple smoothie recipe
 
Prep time
Cook time
Total time
 
With no added sugar this sweet and tangy banana pineapple smoothie is secretly healthy!
Author:
Recipe type: Breakfast
Cuisine: Australian
Serves: 1
Ingredients
  • 1 cup frozen pineapple
  • ½ medium banana
  • ½ cup crushed ice
  • ½ cup Greek yogurt
  • 1 cups almond and coconut milk
Instructions
  1. Add fresh pineapple, banana, Greek yogurt and ice to the blender. Add 1 cup of the almond and coconut milk. Pulse until mixture is smooth. Pour into a glass and drink your refreshing tropical smoothie!
Notes
*DAIRY FREE OPTION: Leave out the yogurt.


Coconut flour pancake recipe

Winter has arrived in Melbourne, and it is COLD, REALLY COLD! And while coconut might not be  quintessentially winter, there is something about this coconut flour pancake recipe that seems perfect for a winter breakfast — enjoyed in my slippers and PJs, of course.

To be honest, I never order pancakes when we go out for breakfast. I’ll almost always choose something else — But for a quick and easy home cooked breakfast it’s hard to go past these fluffy coconut flour pancakes.

This recipe is a great example of a new twist on an old classic.  I don’t know much about its health benefits, coconut flour, but has a unique, nutty flavour making it perfect for pancakes. Fluffy, light, and slightly powdery they have a unmistakeable coconut flavour.

Your pancakes shouldn’t be too large as they can be difficult to flip as they are slightly more delicate than traditional pancakes. They cook quickly, so keep a close eye on them to make sure they don’t burn. Adding extra eggs in the batter help the pancakes hold together. We like to top our paleo coconut flour pancakes with fresh strawberries, banana, and a generous drizzle of maple syrup.

If coconut flour pancakes are not your thing then check out our recipe for Spanish baked eggs or easy lemon curd.

paleo coconut flour pancake ingredientscoconut flour pancake batterpaleo coconut flour pancake recipepaleo coconut flour pancake recipecoconut flour pancakes with strawberries and bananaCoconut flour pancake recipe paleo

5.0 from 1 reviews
Coconut flour pancake recipe
 
Prep time
Cook time
Total time
 
Paleo coconut flour pancake recipe with fresh strawberries, banana, and a generous drizzle of maple syrup.
Author:
Recipe type: Breakfast
Cuisine: American
Serves: 6
Ingredients
  • 4 eggs
  • ½ cup milk
  • 3 tablespoons coconut oil (liquid state, not solid*)
  • ½ cup coconut flour
  • 1 tablespoon granulated sugar
  • ¼ teaspoon baking powder
  • ¼ teaspoon sea salt
Instructions
  1. Melt coconut oil in a small saucepan over low heat just until it became a liquid. After letting it cool a minute or two, I then added it to the wet ingredients.
  2. Heat a griddle or large skillet over medium heat.
  3. In a large bowl, whisk eggs, milk and oil until combined. In a separate medium bowl, whisk coconut flour, sugar, baking powder and salt until well blended.
  4. Add dry ingredients to wet ingredients; stir with a fork until well combined and no lumps remain.
  5. Grease griddle or skillet with oil or butter. Drop ladlefuls of batter, a scant ¼ cup each, onto hot griddle. Cook 3 to 4 minutes until small bubbles begin to form on top, then flip. Cook on other side 1 to 2 minutes until cooked through.
  6. Serve warm with your favorite pancake toppings.


No bake Mars bar slice recipe

Warning this recipe is highly addictive! Proceed with caution… This ultra indulgent no bake Mars bar slice recipe is also dangerously tasty. The humble Mars bar slice has been a staple of Australian households for decades.

Do you love chocolate? Caramel? That memory of chocolate crackles at every birthday party you went to as a kid? Then this no bake Mars bar slice recipe is for you!

Mars bar slice is one of those recipes that has been around for years! In fact, the Mars bar first hit Australian shores in the late 1940’s, first being manufactured under licence by another company until Mars opened up their own manufacturing in Ballarat in 1979. No one really knows who created the original Mars bar slice, but one thing is for certain and that is its delicious. The ooey gooey melted mars bars, combined with rice bubbles and a chocolate icing set on top is not only a treat for the kiddies, it is also a treat for the adults!

If like me you’ve always wondered how to make Mars bar slice you will be pleased to know this recipe is so easy to make, requires only four ingredients and did I mention you don’t have to bake it? Perfect-o! This timeless favourite and crowd-pleasing treat is perfect for those time poor and perfect to make for parties or take along to functions. No doubt it will be a hit with all ages!

Simply melt the mars bars in a large pot with a little butter and add the rice bubbles. Filling a square tin with the mixture, top off with a simple Cadbury chocolate icing and allow to set in the fridge! Slice into bite sized pieces or a squares depending on your preference. Voila!

Note – it is encouraged you share the mars bar slice with friends, family or work colleagues otherwise you will end up eating it all if you have no control!

If you like sweet treats then check out these our recipes for chocolate mint fudge, passionfruit marshmallows, pecan slice, apple and rhubarb crumble, florentine biscuits or afghan biscuits.

No bake Mars bar slice recipe ingredientsNo bake Mars bars slice recipe instructionsNo bake mars bar slice recipeCadbury chocolate mars bar slice recipeSliced mars bar sliceNo bake Mars bar slice recipe

Perfect Mars bar slice tips

Like all baking practice and precision with measurement makes perfect! There are many slight variations but follow these tips for the best Mars Bar Slice recipe.

Because this is a four ingredient Mars bar slice and there it is a no-bake slice it is a straightforward process but following these three tips will ensure it turns out perfect every time.

Use quality ingredients

There are only four ingredients, so use the best. Cadbury milk chocolate, real Mars Bars (none of this Moro bar rubbish), Kellogg’s rice bubbles, and quality butter.

Whisk to ensure a super smooth melted mixture

When melting the butter, Mars Bars together over heat, the mixture can be clumpy. Use a whisk to stir the mixture at the end of the melting process for a super smooth result every time.

Use the back of a spoon for an even finish

After pressing the mixture into the tray, use the back of a spoon to flatten the slice evenly on top before putting in the refrigerator to set.

Mars bar slice recipe FAQs

Q. Why does it taste so good?

The combo of rice bubbles combined with melted Mars Bars and butter… all topped with a layer of chocolate creates the perfect combination of flavour and texture. It’s sweet, crunchy airy and soft all at once making it the perfect comfort food.

Q. How many Mars Bars do you need for the slice?

You need 195g of Mars bars which equates to roughly four 53g mars bars or 11 bite size mars bars depending on the region you live in. If you are a Mars Bar lover, it might pay to buy them on the day you plan to make the slice.

Q. How should you store Mars bar slice?

At room temperature is better than refrigeration when it comes to retaining the quality of the flavour. The best way to store them is to line an air tight container with kitchen paper, and place them on top, if you have two layers worth then add another sheet of baking paper in between before seeling the lid. However, if it is hot in your house then best store it in the fridge. It will last at least a week stored in an airtight container in the fridge.

Q. Can you freeze Mars Bar slice?

You could, and I imagine it would be okay for at least month. Because Mars bar slice is so damn tasty I can’t imagine ever needing to freeze it.

Q. How long does Mars Bar Slice last?

If it lasts more than a few days, then you obviously have more will power than us.

No bake Mars bar slice recipe instructions

5.0 from 1 reviews
No bake Mars bar slice recipe
 
Prep time
Cook time
Total time
 
Mars bar slice recipe the ooey gooey melted mars bars, combined with rice bubbles and a chocolate icing set on top is not only a treat for the kiddies, and is also a treat for the adults!
Author:
Recipe type: Dessert
Cuisine: American
Serves: 20
Ingredients
  • 195g Mars bar chopped (approx. 11 bite sized Mars bars)
  • 75g butter
  • 3 cup rice bubbles
  • 200 g milk chocolate
Instructions
  1. Line a square 16 inch baking tray with baking paper.
  2. Combine your chopped Mars Bars and butter in a saucepan. Stir constantly over low heat, do not boil. Stir until the mixture is smooth.
  3. Stir in your Rice Bubbles.
  4. Press your mixture evenly into your lined baking tray.
  5. Microwave your chocolate in a small bowl until melted. Use a low setting. Stir every 20-30 secs.
  6. Spread the chocolate nice and even over the slice mixture and refrigerate until set.


Choc chip coffee biscotti recipe

This choc chip coffee biscotti recipe opened my eyes to the flavours you can have in biscotti. Before this recipe, I had only tasted Brooke’s cranberry and pistachio biscotti, which is amazing. But this coffee biscotti made with a combination of coffee, chocolate, walnuts, and cinnamon might be my new favourite!

We opted to use milk chocolate chips, however, you could use dark chocolate if you want to make it a bit healthier. Adding toasted walnuts delivers a slight hint of bitterness that cuts through all that sweetness, and adds a second layer of crunch.

The coffee biscotti’s crisp and crunchy texture comes from baking the cookies twice. The first baking sets the dough, while the second baking dries it out. The biscotti’s instantly recognizable long curved shape comes from forming the dough into a log and then cutting the log into slices after the first baking. The slices of biscotti are then baked until most of their moisture is removed.

Vary the length of the second bake to change the texture of your biscotti recipe. If you like a hard and crunchy biscotti, perfect for dipping in your coffee, you can bake them a bit longer than we did in the recipe. These cookies do store for several weeks in an airtight container making them perfect for unexpected guests or for keeping at your desk at work.

I love my coffee so there is only one thing better than drinking a coffee, drinking a coffee while eating a piece of this choc chip coffee biscotti!

Recipe adapted from Crumb.

Choc chip coffee biscotti ingredientsChoc chip coffee biscotti recipechocolate coffee biscotti recipeChocolate chip coffee biscottiChoc chip coffee biscotti

Coffee biscotti – Recipe Instructions

Choc chip coffee biscotti recipe
 
Prep time
Cook time
Total time
 
Coffee biscotti made with a combination of coffee, chocolate, walnuts, and cinnamon.
Author:
Recipe type: Breakfast
Cuisine: Italian
Serves: 40
Ingredients
  • 2 cups flour
  • ½ cup sugar
  • ½ cup brown sugar
  • 1 tsp baking powder
  • 1 tsp instant coffee granules
  • ½ tsp ground cinnamon
  • ½ tsp salt
  • ¼ cup cold (cut into small cubes)
  • 1 cup milk chocolate chips
  • ½ cup chopped toasted walnuts
  • 3 eggs, lightly beaten
  • Egg wash (1 egg, lightly beaten with 2 tbsp milk)
Instructions
  1. Preheat oven to 180 Celsius (350F). Line two large baking sheets with parchment.
  2. In a large mixing bowl, combine flour, sugar, brown sugar, baking powder, coffee granules, and salt. Using a pastry cutter or 2 knives, cut in the butter until the mixture is fine and crumbly.
  3. Stir in chocolate chips, walnuts, and eggs until the dough is just barely moistened. Turn out onto a lightly floured surface, and knead lightly until the dough is soft and slightly sticky, about 8-10 times.
  4. Using floured hands, divide the dough into quarters. Shape each quarter into a 9" long roll. Place two rolls 4 inches apart on each of the prepared cookie sheets, gently flattening each one into a 2" wide slab. Brush the top and sides with egg wash.
  5. Bake in preheated oven for 30 minutes, or until the top of the slabs feels firm and dry. Remove from the oven, but do not turn off the heat. Set the slabs on a wire rack to cool for 10 minutes.
  6. Once the slabs are cool enough to handle, cut crosswise into ½ inch thick slices. Place slices upright, inch apart, on cookie sheets.
  7. Place the slices on the baking sheet, cut sides down, and return to the oven to bake for 10 minutes. Turn biscotti over, and continue baking for another 10 minutes (the cookies should be just a bit soft in the center – don’t worry, they’ll harden up once they cool). Transfer to a wire rack to cool completely, then store in airtight containers.