Slow Cooker BBQ Beef Short Ribs

Sunday morning I awoke to the magical words “I think I want to make slow cooker BBQ beef short ribs for dinner”. As I wiped the drool from my mouth, thanking my lucky stars my response was that sounds amazing! Being Sunday it was market day, so we stopped by our favourite butcher at South Melbourne markets who was kind enough to cut them especially for us. These slow-cooked BBQ beef short ribs are falling-off-the-bone tender and are surprisingly easy to make.

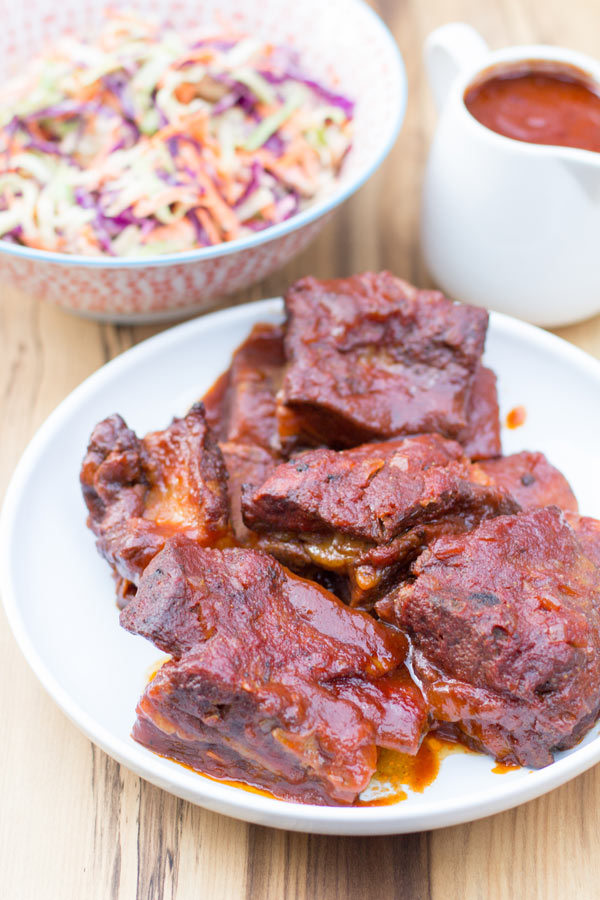
Start by preparing your sauce straight in the slow-cooker to save on washing up. To ensure you seal in the flavour and increase the chance of caramelisation, simply season your ribs first with salt and pepper and brown them off quickly in a hot fry pan with a little olive oil. Place the ribs in the slow cooker and cover them in the beautiful sticky sauce. Let the slow cooker work it’s magic for the next 8 hours on a low temperature.

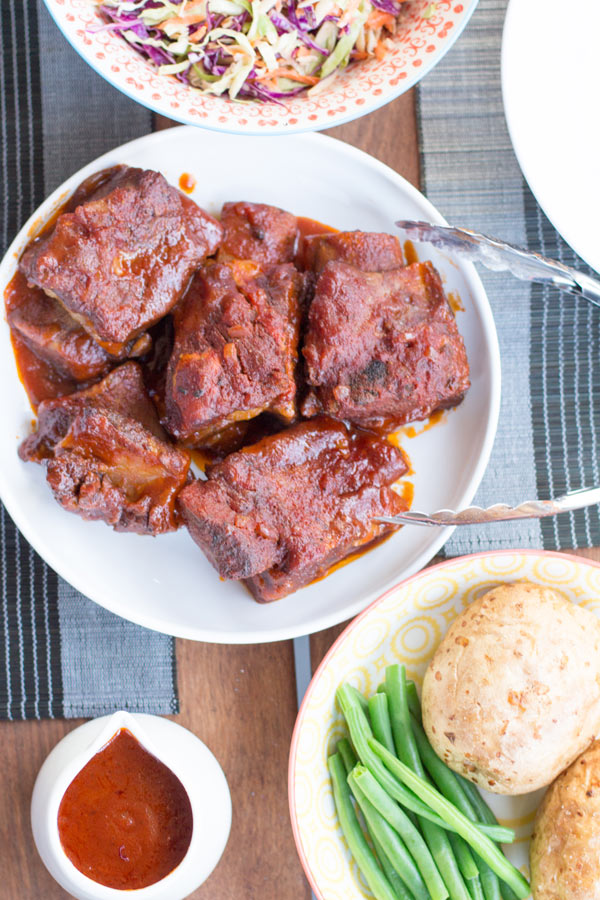
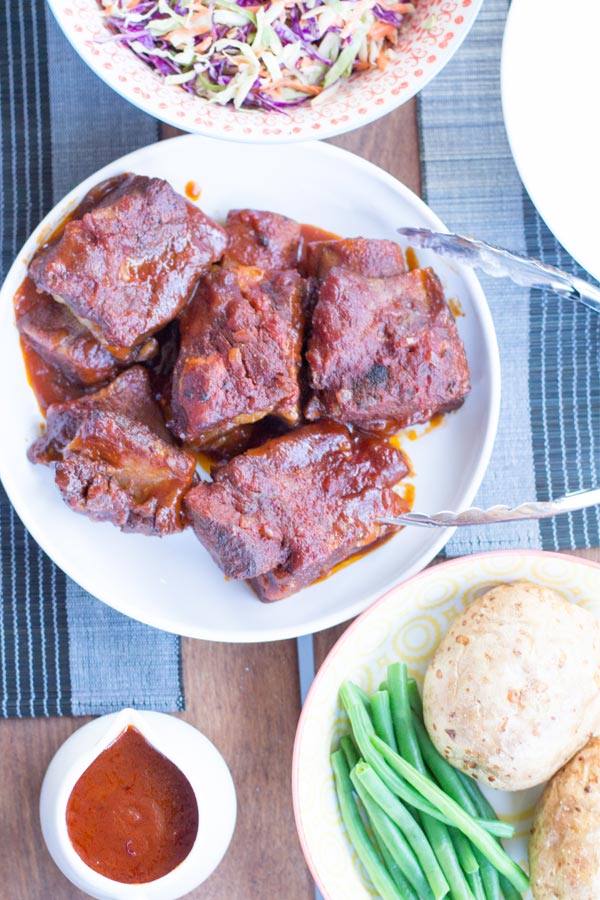
Brooke chose to serve these Slow Cooker BBQ Beef Short Ribs with baked potatoes, green beans, and coleslaw. It was the perfect Sunday night dinner!  Sticky and delicious, these beef short ribs are a real showstopper and will fill your house with a delicious aroma. It’s also one of those recipes that will mellow and taste even better the next day if you are lucky enough to have any left that is.

If pork is your meat of choice then check out our recipe for Asian BBQ Pork Ribs instead.

Slow cooker BBQ beef short ribs ingredientsSlow Cooker BBQ Beef Short Ribsslow cooker bbq beef short ribs

Slow Cooker BBQ Beef Short Ribs – Recipe Instructions
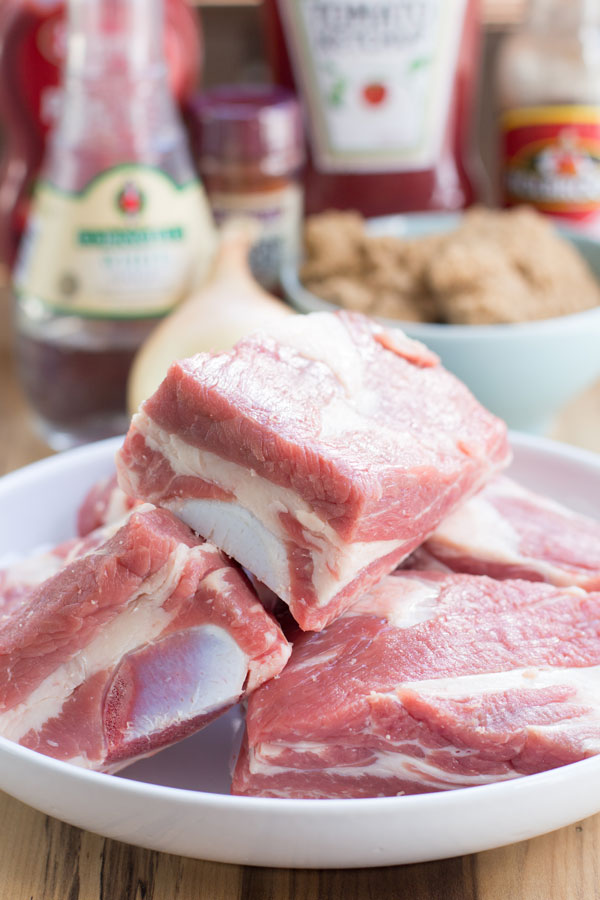
Slow Cooker BBQ Beef Short Ribs
 
Prep time
Cook time
Total time
 
Slow cooker BBQ beef short ribs which are falling-off-the-bone tender and are surprising easy to make.
Author:
Recipe type: Dinner
Cuisine: American
Serves: 4 serves
Ingredients
Ribs
  • 1kg Beef short ribs
  • Salt and pepper to season
BBQ Sauce
  • 1 cup tomato sauce
  • ¾ cup tomato paste
  • ½ cup white vinegar
  • ¾ cup brown sugar
  • ½ cup water
  • 1 tablespoon Worcestershire sauce
  • 1 small onion finely diced
  • 1 teaspoon cayenne pepper
  • ½ teaspoon salt
Instructions
  1. Season the ribs with salt and pepper and brown off the meat in a lightly oiled fry pan.
  2. Mix ketchup, tomato paste, vinegar, brown sugar, water, diced onion and salt in a slow cooker, stirring to dissolve brown sugar and salt.
  3. Place short ribs into the sauce and stir to coat.
  4. Set cooker onto Low, cover, and cook for 8 hours.


Fruit and Custard Tart

It’s the first post of the NEW YEAR, and there is no time for New Year resolutions in this household, there is only time for a tasty fruit and custard tart!

This classic fruit and custard tart has four components, a fluted edged sweet pastry crust, luscious crème patissiere, whipped cream and glistening rows of fresh fruit.

While the components of this fruit and custard tart can be made a day or two in advance, it is best enjoyed the day it is assembled. The cookie-like pastry crust has a sweet flavor and a crisp texture that is the perfect case for holding the pastry custard and cream. Once the crust is baked and cooled, the crust is then sealed by brushing on a thin layer of apricot glaze. This will prevent the filling from softening the crust over time. The classic filling for a fruit tart is crème patissiere, which is a rich, thick custard made from a mixture of milk, vanilla, eggs, sugar, flour and cornstarch (a thickening agent) that is cooked on the stove. We added a layer of whipped cream on top of the pastry custard before applying our fruit.

Of course, the first thing you notice about a fruit tart is the beautiful fruit arranged in concentric circles on top of the cream. There are so many fruits to choose from but it is important that the fruit looks and tastes its best. While berries, with their vibrant colours, are always popular, other fruits are nice as well. We opted for preserved peaches, slices of fresh kiwi, blueberries and raspberries. To finish off glaze the fruit with either an apricot glaze (recipe included) to give the fruit a lovely shine and it also prevents the fruit from drying out.

Looking for other fruit based desserts then check out our Grilled Peaches with Ricotta and Balsamic Glaze or Apple and Rhubarb Crumble.

Fruit and Custard Tart RecipeCustard and Fruit TartFresh Fruit and Custard TartFruit and Custard Tart GlazeFruit and Custard TartFruit and Custard Tart Recipe

Tasty Fruit and Custard Tart – Recipe Instructions

Fruit and Custard Tart
 
Prep time
Cook time
Total time
 
This classic fruit and custard tart has four components, a fluted edged sweet pastry crust, luscious crème patissiere, whipped cream and glistening rows of fresh fruit.
Author:
Recipe type: Tart
Cuisine: French
Serves: 8
Ingredients
Sweet Pastry Crust
  • 1 ½ cups of all-purpose flour
  • ⅛ teaspoon salt
  • ½ cup unsalted butter, at room temperature
  • ¼ cup of granulated white sugar
  • 1 large egg, lightly beaten
Creme patissiere
  • 1 ¼ cups of 2% milk
  • ½ vanilla bean, split lengthwise or teaspoon pure vanilla extract
  • 3 large egg yolks
  • ¼ cup granulated white sugar
  • 2 tablespoons all-purpose flour
  • 2 tablespoons cornstarch (corn flour)
Whipped Cream
  • 300 ml of whipped cream
Apricot Glaze
  • ½ cup apricot jam or preserves
  • 1 tablespoon water
Toppings
  • 3 cups of fruit (we used preserved peaches, fresh kiwi fruit, blueberries and raspberries
Instructions
Sweet Pastry Crust
  1. Place the flour, butter and sugar in a food processor and process until the mixture resembles fine breadcrumbs.
  2. Add the beaten egg and process until the mixture just comes together.
  3. Turn the dough onto a lightly floured surface and knead until smooth.
  4. Flatten the pastry into a disk, cover the pastry into a disk, cover with plastic wrap, and refrigerate for 15-30 minutes or just until firm.
  5. Lightly spray with a non-stick vegetable/flour cooking spray, an 8 - 9 inch (20 - 23 cm) tart pan with a removable bottom.
  6. Evenly pat the chilled pastry onto the bottom and up the sides of the pan. Cover with plastic wrap and place in the freezer for about 15 minutes.
  7. Meanwhile, preheat oven to 400 degrees F (205 degrees C) and place rack in center of oven. Lightly prick bottom of pastry crust with the tines of a fork (this will prevent the dough from puffing up as it bakes). Place tart pan on a larger baking pan and bake crust for 5 minutes. Reduce oven temperature to 350 degrees F (180 degrees C) and continue to bake the crust for about 15 minutes or until dry and lightly golden brown. Remove from oven and place on a wire rack to cool completely before filling. Can be covered and stored for a few days.
Creme patissiere
  1. In a medium-sized heatproof bowl, mix the sugar and egg yolk together (Do not let this sit too long).
  2. Sift the flour and cornstarch (corn flour) together and then add to the egg mixture, mixing until you get a smooth paste.
  3. Meanwhile, in a saucepan bring the milk and vanilla just to boiling (just until milk starts to foam up.)
  4. Remove from heat and add slowly to egg mixture, whisking constantly to prevent curdling. (You can strain the mixture, if you get lumps).
  5. Pour the egg mixture into a medium saucepan and cook over medium heat until boiling, whisking constantly. When it boils, whisk mixture constantly for another 30 - 60 seconds until it becomes thick.
  6. Pour into a clean bowl and immediately cover the surface with plastic wrap to prevent a crust from forming. Cool to room temperature.
  7. Beat or whisk before using to get rid of any lumps that may have formed.
Whipped Cream
  1. Lightly whip 300 ml of fresh cream using an electric beater.
Apricot Glaze
  1. Heat the apricot jam (preserves) and water in a small saucepan over medium heat until liquid. This can also be done in the microwave.
  2. Remove from heat and strain the jam through a fine strainer to remove and fruit lumps.
Assemble the tart
  1. Remove the tart from the fluted sides of the pan.
  2. Spread a thin a thin layer of apricot glaze over the bottom and sides of the baked tart shell to prevent the tart from getting soggy.
  3. Let the tart dry for 20 minutes.
  4. Add first layer of creme patissiere.
  5. Add second layer of whipped cream.
  6. Place fruit in concentric overlapping circles, starting at the outside edge.
  7. After arranging the fruit, rewarm the glaze, and gently brush a light coat on the fruit.
  8. Serve immediately, or if refrigerating bring to room temperature before serving. This fruit tart is best eaten the same day as it is assembled. Cover and refrigerate any leftovers.


Simple Gingerbread Cookies

In our house, Christmas time is all about the baking. Brooke baking and me eating, that is. It’s a great balance! Although we have a few “go to” recipes this time of year; Cranberry and Pistachio Biscotti, Apricot Balls and of course Choc Mint Fudge! You cannot go past a Christmas classic like Gingerbread. These simple gingerbread cookies are really easy to make and they turn out perfect every time. The dough can also be rolled and cut into any shape which makes it a great activity for those who have kids.

Like a true Australian, this recipe for Gingerbread cookies uses golden syrup, not molasses which is commonly used in all American recipes. You start with butter, brown sugar and golden syrup melting in a pot then incorporating the flour, egg and spices! When we make anything with spice (like our Ginger Nut Biscuits) we like a lot of flavour. For our spice combination, we used ground ginger, cinnamon, nutmeg and ground cloves, which will leave your house filled with the smell of Christmas once you’re done.

The most important steps to remember when making these biscuits is you must allow enough time for the dough to chill. This will stop the shapes from shrinking when you bake them. For those who are time poor (or impatient like Brooke) I would suggest you portion the dough into quarters and wrap each quarter separately allowing it to chill faster. The other tip is ensuring you get the perfect colour on your shapes. To avoid over browning, remove the gingerbread from the oven when it is a light golden colour. The biscuits may look soft, but they will firm up once cooled.

Once you have your biscuits ready to bake, place the cut-out dough onto a lined baking sheet. They won’t really spread (if chilled properly). They should take about 10-12 minutes in the oven for smaller shapes or 12-15 minutes for larger shapes, or until golden brown. Set aside trays to completely cool before decorating with royal icing.

Royal icing sets hard making it perfect for icing cookies, biscuits and for adding a decorative touch to your gingerbread men, Christmas trees or stars!

Simple Gingerbread Cookies RecipeSimple Gingerbread Cookies DoughSimple Gingerbread CookiesSimple Gingerbread CookiesSimple Gingerbread Cookies

Simple Gingerbread Cookies – Recipe Instructions

Simple Gingerbread Cookies
 
Prep time
Cook time
Total time
 
These simple gingerbread cookies are really easy to make and they turn out perfect every time.
Author:
Recipe type: Cookies
Cuisine: Australian
Serves: 40
Ingredients
Gingerbread Cookies
  • 150g butter, softened
  • ½ cup brown sugar
  • ½ cup golden syrup
  • 1 Egg
  • 3 cups plain flour, sifted
  • 1 tbs ground ginger
  • 1 tsp ground cinnamon
  • ½ tsp group nutmeg
  • ¼ tsp ground cloves
Royal Icing
  • 1½ cups pure icing sugar, sifted (see note)
  • 1 eggwhite
  • ½ teaspoon lemon juice
Instructions
Gingerbread cookies
  1. Preheat oven to 180ºC. Line baking tray with baking paper.
  2. Melt butter, sugar and golden syrup together in a saucepan, stirring until smooth. Cool slightly. Transfer the butter mixture to a medium bowl. Add the egg and whisk to combine. Stir in the sifted flour and spices. Turn onto slightly floured surface and knead until smooth. Divide the dough into quarters, wrap with plastic and place in the fridge for at least 30 mins or until firm.
  3. Roll each portion out onto a lightly floured surface (or between two sheets of baking paper) to a 3mm thick disc. Cut out your desired shapes. Place onto the lined trays. Bake for 10-12 mins for smaller shapes or 12-15 mins for larger shapes, or until light golden. Set aside on trays to cool completely.
  4. To decorate, prepare royal icing and decorate your shapes for a festive touch.
Royal Icing
  1. Lightly whisk eggwhite and lemon juice together in a bowl. Gradually add icing sugar, whisking until smooth and combined.
Notes
Divide your icing adding a few drops of colouring if you wish to decorate your gingerbread with a few colours!


Prawn Rice Paper Rolls with Hoisin Dipping Sauce

These homemade Prawn Rice Paper Rolls with Hoisin Dipping Sauce are one of my favourite go to recipes for summer! With the weather warming up here in Melbourne (finally!), Brooke and I thought it would be great to share with you how easy and adaptable rice paper rolls can be. Other variations of rice paper rolls on the blog are our chicken vietnamese rice paper rolls and our vegetarian rice paper rolls both equally simple and tasty.

For this recipe we have used some Queensland prawns which we bought at the South Melbourne Markets on our usual Sunday shop. Giving them a quick clean and cutting the larger prawns in half, Brooke cooked the prawns in a little fresh chilli and garlic for an extra kick. However, the prawns can be left plain letting their natural sweetness come through.

For those of you who haven’t made homemade rice paper rolls before, they are actually quite easy once you have made them a few times. The trick is to making sure you have all your ingredients prepared before you start assembling.

Now depending on the brand of rice paper wrappers you buy, they can be a little fiddly to make, if you accidentally rip the rice paper when trying to roll them, don’t stress – these are simply the “taste testers”. When assembling the rolls, the key is to not over-fill and leave enough room around the sides of the rice paper for folding and rolling. Once you have done a couple you will master your own “tuck and roll” technique.

Prawn Rice Paper Rolls with Hoisin Dipping SaucePrawn Rice Paper Rolls with Hoisin Dipping SaucePrawn Rice Paper Rolls with Hoisin Dipping SaucePrawn Rice Paper Rolls with Hoisin Dipping Sauce

Prawn rice paper rolls – Recipe instructions

Prawn Rice Paper Rolls with Hoisin Dipping Sauce
 
Prep time
Cook time
Total time
 
Homemade Prawn Rice Paper Rolls with Hoisin Dipping Sauce.
Author:
Recipe type: Seafood
Cuisine: Vietnamese
Serves: 24
Ingredients
Hoisin Dipping Sauce
  • 2 – 3 Tablespoons Hoisin Sauce
  • 1 Teaspoon Soy Sauce (Salt Reduced)
  • ½ Teaspoon minced Chilli
  • ½ Teaspoon crushed peanuts
Prawn Rice Paper Rolls
  • 24 spring roll rice paper wrappers
  • 1 large or 2 small carrot, peeled and julienned
  • 1 large cucumber, julienned
  • 3 spring onions, julienned
  • 1 ounce cooked rice noodles/rice vermicelli (optional)
  • 4 large green lettuce leaves, shredded
  • 200g medium cooked prawns, peeled and sliced in half length-wise
  • Fresh herbs (chives, coriander or mint)
Instructions
  1. When you’re ready to assemble the rolls, fill a shallow dish with warm water.
  2. Dip one rice paper wrapper into the water for 15-20 seconds and place on a clean flat surface.
  3. Fill the rolls: Place a few sticks of carrot, cucumber, spring onion, and small amount of lettuce on top of the bottom ⅓ of the rice paper. Then, a small amount of noodles (if using), a selection of herbs and two prawns. Remember, do not overfill the roll. Start small then add more if needed.
  4. To roll: Tuck over each side, then pull the bottom of the roll and roll over the filling, remembering to roll and use your hands to tuck the filling as you go.
  5. Repeat with the remaining rice paper wrappers and filling.
  6. Serve the spring rolls whole, or sliced in half with a Hoisin Dipping Sauce.

Blueberry and Lemon Loaves

Now for those of you who have seen our recipe for Blueberry and Lemon cupcakes, this is not a repost. It is just a fact we love the combination of blueberries and lemon together! We love them so much we bought a dwarf lemon tree and also a blueberry bush the other weekend. These Blueberry and Lemon Loaves are just so easy and tasty you have to give them a try.

It is currently blueberry season in Australia and at the moment and we cannot resist the punnets when we are at the shops or markets. As a result, we have ended up with an abundance of blueberries in the fridge! For those of you who know Brooke is a fan of all things lemon, there are always a couple of lemons in the fruit bowl as well making this simple recipe a perfect treat to make on a lazy weekend.

This recipe is courtesy of Live Well Bake Often and is made as one loaf. However, due to time restrictions, we decided to make this into 8 small loaves, which for the two of us works perfectly for a snack to take to work during the week.

Blueberry and lemon loavesBlueberry and lemon loaves recipesBlueberry and lemon loavesBlueberry and lemon cake recipeBlueberry and lemon loavesBlueberry and lemon loaves recipe

Tasty Blueberry and Lemon Loaves – Recipe Instructions

Blueberry and Lemon Loaves
 
Prep time
Cook time
Total time
 
Blueberry and Lemon Loaves perfect for a snack to take to work during the week.
Author:
Recipe type: Dessert
Cuisine: American
Serves: 8
Ingredients
  • 2 cups all-purpose flour + 1 tablespoon, divided
  • 2 tsp. baking powder
  • ½ tsp. salt
  • ½ cup. vegetable oil
  • 2 tsp. vanilla extract
  • 2 eggs
  • 1 cup granulated sugar
  • 1 cup plain greek yogurt (or sour cream)
  • Zest & juice of 1 lemon
  • 1 cup blueberries
  • Lemon Glaze
  • ¾ cup icing sugar
  • 1-2 tablespoons fresh lemon juice
Instructions
  1. Preheat oven to 180°C. Spray a 9x5 loaf pan or small 8 loaf tin with cooking spray and set aside.
  2. In a small bowl, toss the blueberries with 1 tablespoon of the flour and set aside (this helps to prevent the blueberries from sinking).
  3. In a large bowl, whisk together 2 cups of flour, baking powder, and salt. Set aside.
  4. In a separate bowl, mix together the oil, vanilla, eggs, sugar, greek yogurt, lemon zest, and lemon juice.
  5. Combine the wet and dry ingredients, just until smooth. Do not overmix or your bread will come out tough.
  6. Lightly fold the blueberries into the batter.
  7. Pour batter into prepared loaf pan and bake for 15- 20 minutes. The loaves will be finished when a skewer inserted into the center comes out clean.
  8. Once loaves are finished, remove from oven and allow to cool for about 10 minutes in the baking tin. Remove from baking tin and transfer to a wire rack to cool completely.
  9. Once loaves are cool, whisk together the icing sugar and lemon juice. Start with half the lemon juice and whisk well. If your mixture is too thick, slowly add the rest of the juice.
  10. Using a spoon, drizzle the glaze on top of your loaves. The glaze should harden up a little more after about 15-20 minutes