Honey Ginger Almonds

Last Updated on April 9, 2016 by Grab Your Spork

After making the maple mixed nut granola last week Brooke still had a heap of leftover almonds. To try and get rid of the rest of them, I suggested using them to make some roasted honey ginger almonds. Now this recipe does not restrict you to only using almonds, but if you ever have nuts left over and want to make a great snack, this is a great way to make use of them.

Now the beauty of using almonds is not only are they a nutritious and protein-packed snack. They also contain vitamin E, magnesium, fibre and are low in cholesterol. And of course through adding the wonderful flavours of honey and ginger you will end up with an easy-to-make addictive sweet and crunchy treat!

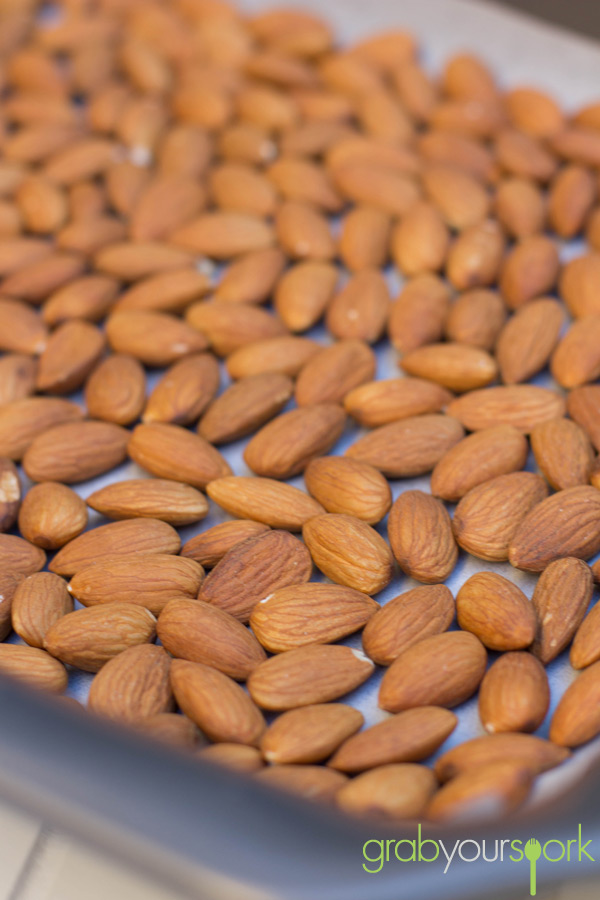
To start this recipe you need to roast the almonds first, before flavouring them. Through toasting the almonds first it will give them a better flavour, and enhance your recipe. Once your almonds have been roasted and the skins have begun to crack, you can candy them on the stovetop before returning to the baking tray to let crisp.

As I said before this recipe is easy and the flavours can be easily changed to suit your taste or even your preference of nuts!  Roasted honey ginger almonds are a perfect snack for any occasion.

If you are looking for another nut based recipe then try our pecan slice recipe.
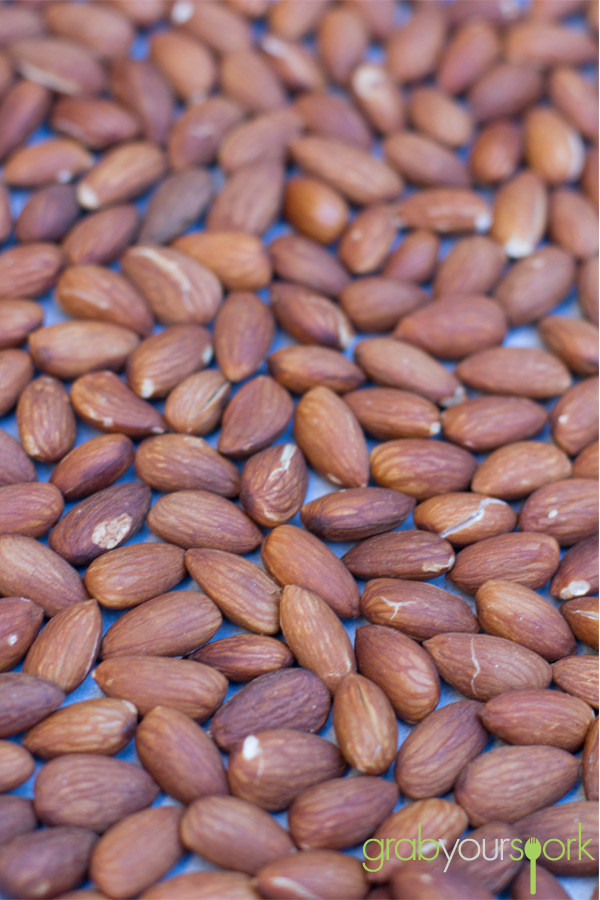
Almonds

Oven Roasted Almonds

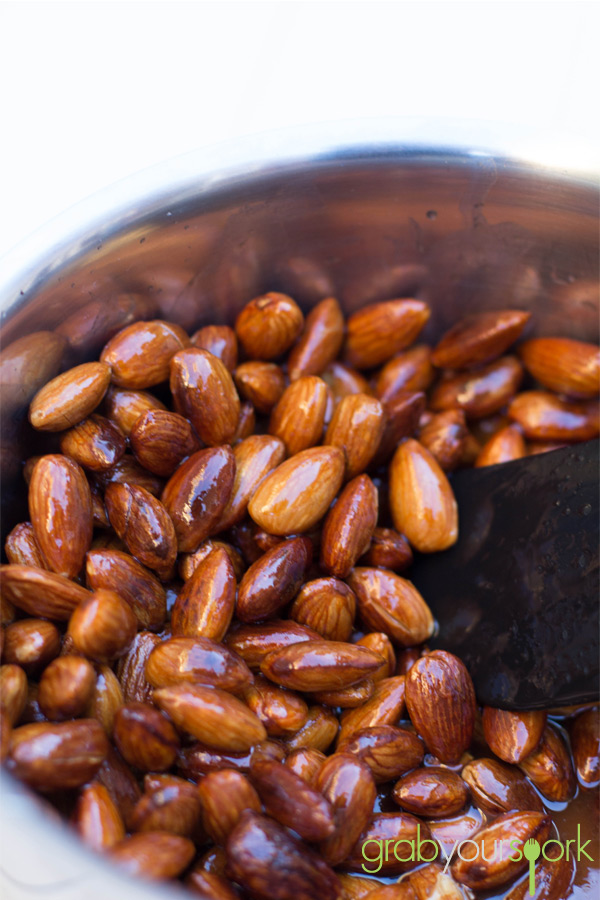
Honey Ginger Almonds

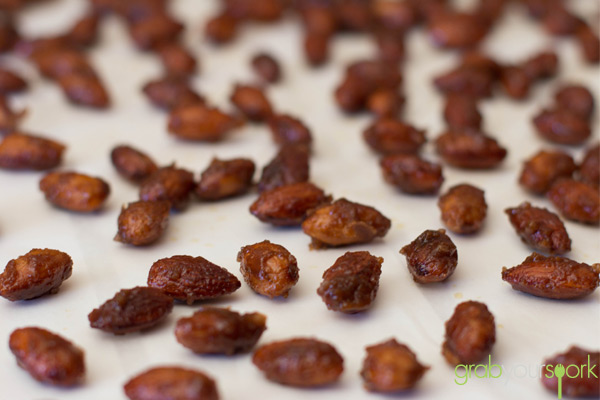
Honey Ginger Almonds

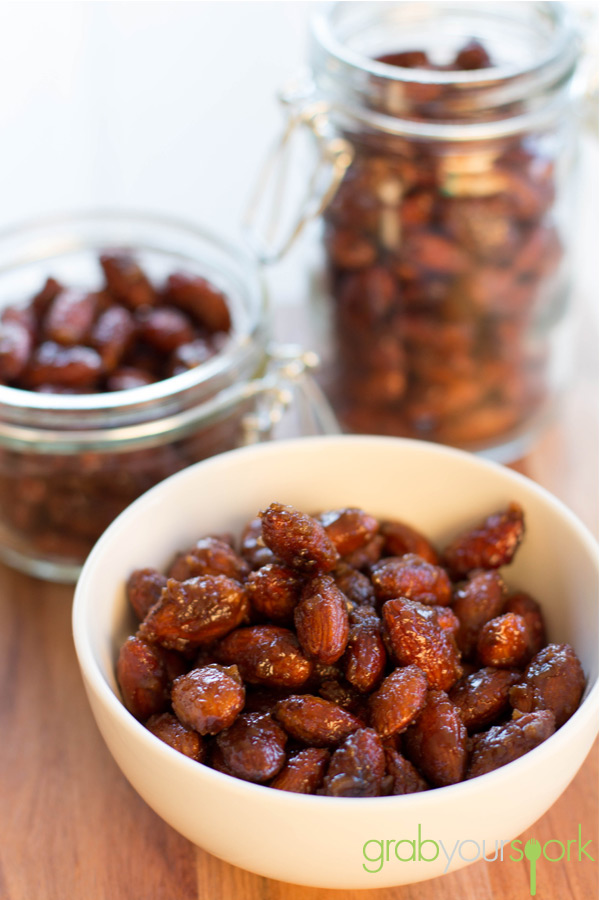
Bowl of Honey Ginger Almonds

Honey ginger almonds – Recipe Instructions

Honey Ginger Almonds
 
Prep time
Cook time
Total time
 
These Honey Ginger Almonds make a nutritious and flavoursome protein-packed snack.
Author:
Recipe type: Snack
Cuisine: Australian
Serves: 6
Ingredients
  • 2 cups raw almonds
  • ¼ cup dark brown sugar
  • 1 teaspoons sea salt
  • 2½ teaspoons ground ginger
  • 2 tablespoons honey
  • 2 tablespoons water
  • 2 teaspoons grapeseed oil
Instructions
  1. Place the almonds on a baking sheet and roast them in the oven at 325º for 10 to 15 minutes. Remove them from oven and set aside.
  2. In a small bowl combine the dark brown sugar, ground ginger and salt, grind the mixture with a fork until well combined, set aside.
  3. In a medium-sized saucepan heat the honey, water and oil until it boils. Reduce the heat and add the roasted almonds into the saucepan. Stir continually over low heat until almonds are coated and all the mixture is absorbed by the almonds, remove saucepan from stove and add the sugar mixture
 

Oysters Kilpatrick

Last Updated on April 8, 2016 by Grab Your Spork

Now I am sure even the thought of an oyster has already turned some of you away, and even for food lover Brooke it pushes the limits. While you real oyster lovers out there would disapprove of cooking or merely dressing an oyster but, for those of you who would prefer to disguise the look of the oyster, oysters kilpatrick is your answer. This oysters kilpatrick recipe is so simple you will wonder why you never tried making them sooner.

These retro Australian classics are one of my favourite ways to eat oysters, as they contain one of the world’s best ingredients BACON! Yes, it might seem like an odd combination. But I guarantee if you go to a bar or a restaurant in Australia and if they have oysters on the menu, they will have oysters kilpatrick (or Killers) on it too.

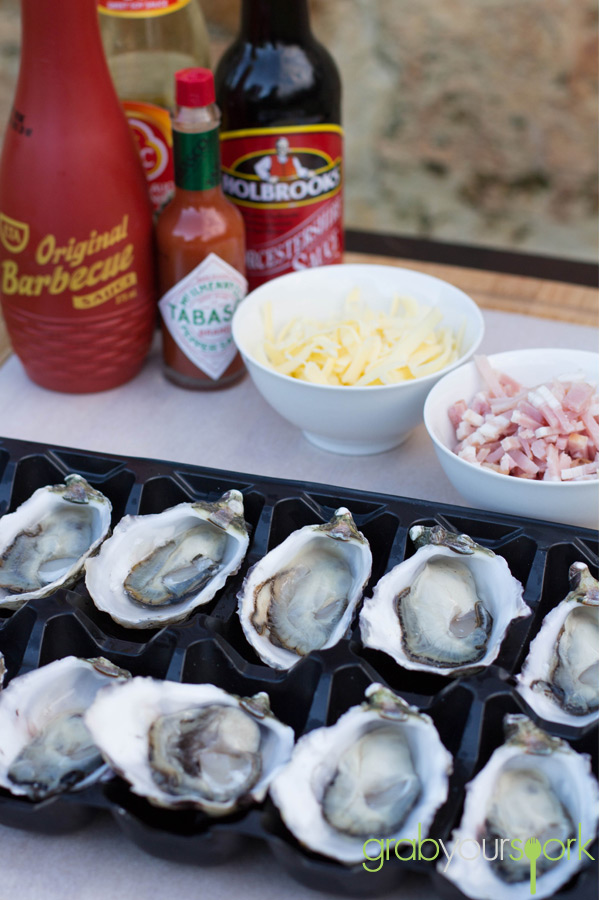
Oysters Kilpatrick are so easy to make and take very little time to prepare. For this recipe we used a more traditional method combining Worcestershire sauce, tomato sauce, bacon and wait for it the most odd ingredient cheese! Now some other recipes don’t include cheese, and to be honest I am not sure I will include it next time. However, through including it in the sauce I do find it adds a slight creamy texture to the sauce.

The key to this oysters kilpatrick recipe though is trying to balance the sauce. Even though you’re adding it to the oyster you still want to showcase the natural sweet and saltiness of the oyster. In addition depending on where you buy your oysters from they will vary in size. The trick to remember is to adjust the time accordingly depending how big they are. You only want to warm the oyster, not cook it so it starts to shrink or turns to rubber.

To finish off I like to add a couple of drops of Tabasco to each oyster to give them an extra bit of kick.

If you like seafood then be sure to try our salt and pepper squid recipe.

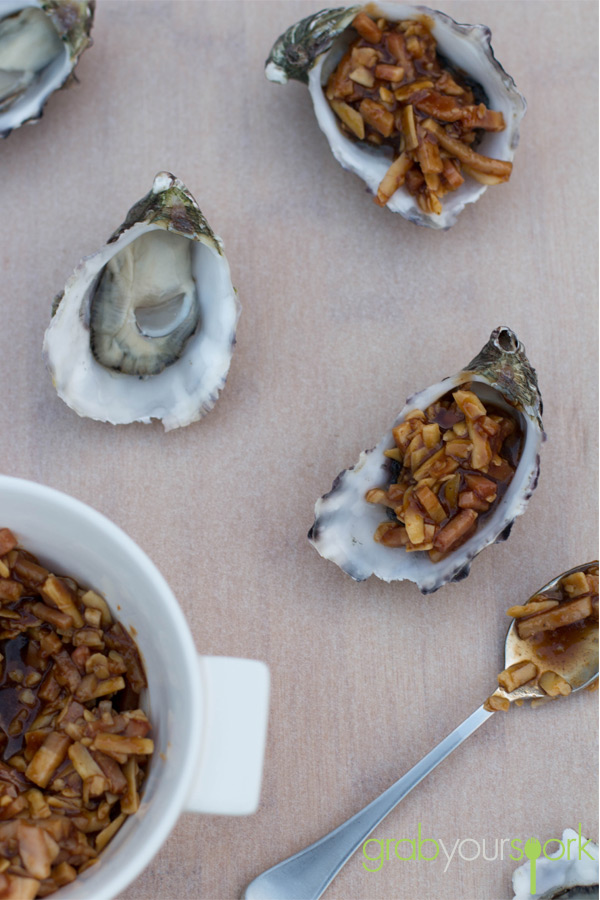
Oysters Kilpatrick Ingredients

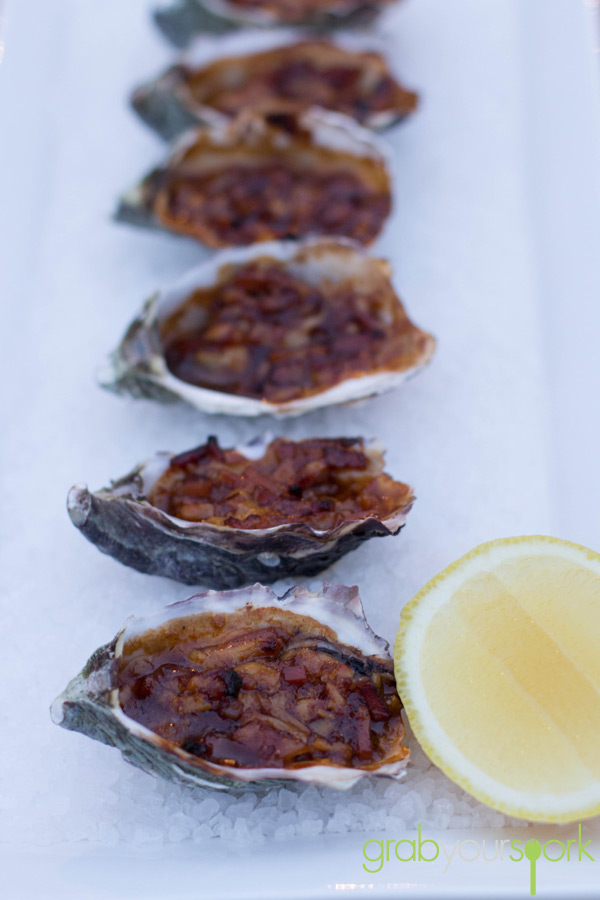
Australian Oysters Kilpatrick

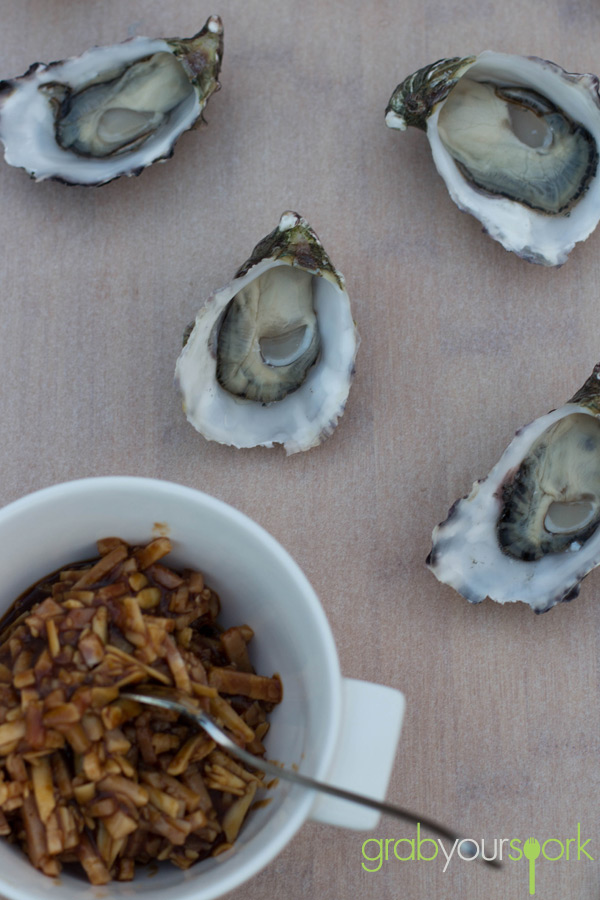
Preparing Oysters Kilpatrick

Oysters Kilpatrick

Oysters kilpatrick – Recipe Instructions

5.0 from 3 reviews
Oysters Kilpatrick
 
Prep time
Cook time
Total time
 
Author:
Recipe type: Seafood
Cuisine: Australian
Serves: 4
Ingredients
  • 40ml BBQ sauce
  • 40ml Tomato sauce (Ketchup)
  • 40ml Worcestershire sauce
  • 20ml Kecap manis
  • 1 tps Tobasco sauce
  • 1½ tps garlic, crushed
  • ¼ tps salt
  • ¼ tps fresh black cracked pepper
  • 1 cup cheddar cheese finely grated
  • 1 cup bacon, finely diced
  • 2 dozen oysters in their shells
  • rock salt to serve
Instructions
  1. Preheat the ove to 180 degrees Celsius.
  2. Mix all the ingredients, except for the oysters in a bowl.
  3. Place the oysters on a wire rack and top each oyster with 1 heaped teaspoon of the mixture.
  4. Cook for approximately 15 minutes.
  5. To serve, line a dish with rock salt and place the oysters on top.
  6. Serve with a check of lemon and tabasco sauce for those who like it hot!


Healthy savoury muffins recipe

Last Updated on January 19, 2020 by Grab Your Spork

When Brooke told me that she was going to make this vegetarian healthy savoury muffins recipe, at first I was a little skeptical. Anything with the word vegetarian typically has me scrunching up my face as my initial reaction. The thing was, as Brooke began to rattle off the list of ingredients including, Kalamata olives, semi sun-dried tomatoes and feta just to name a few I was quickly being won over by this savoury muffins recipe.

The thing about these vegetable muffins is they are incredibly versatile, you can have them for breakfast, lunch or dinner or even just as a lunchbox snack. Brooke and I took them to work with us throughout the following week. Personally, I couldn’t seem to get past morning tea without eating mine. However, Brooke managed to wait and have hers with soup at lunchtime.

Not only are these really tasty savoury muffins, but they are also really filling and pretty healthy too. The beauty of these muffins is you can also freeze them to eat during the week or whenever you feel like a sugar-free snack.

I can definitely see this healthy savoury muffin recipe becoming a go to recipe in case of a snacking emergency. Although I think next time I will sneakily add some bacon or chorizo while Brooke is preoccupied in the kitchen (Insert evil laugh).

If you have a craving for something sweet and vegetable savoury muffins just won’t cut it then check our recipes for blueberry and lemon cupcakes, pecan slice, apple and rhubarb crumble or no bake mars bar slice.

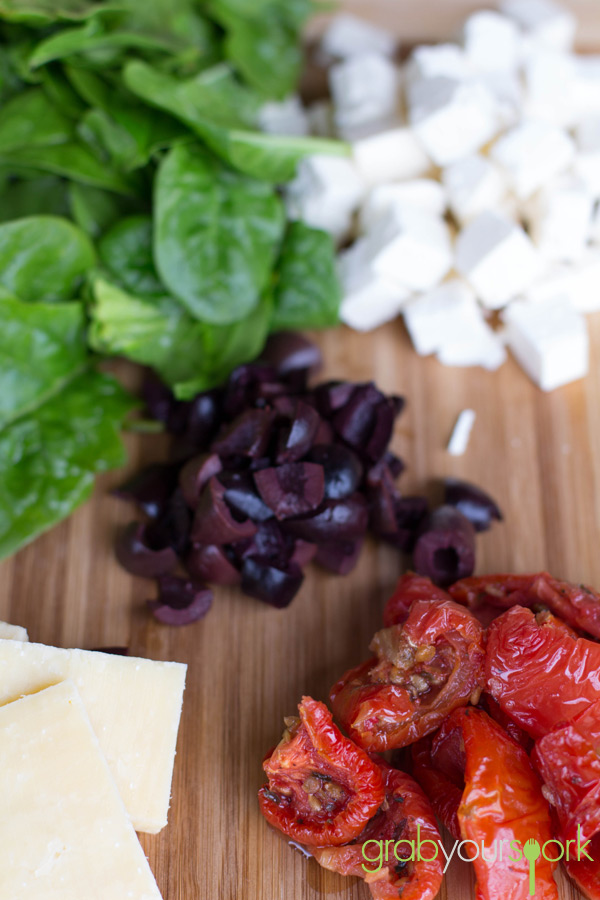
Spinach, Semi Sundried Tomatoes, Feta, Kalamata Olives

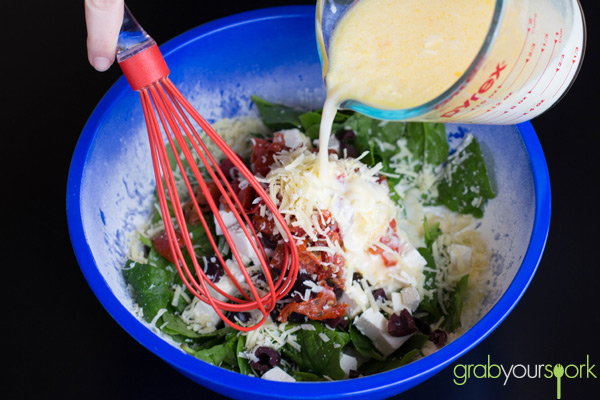
Savoury Muffins Mixture

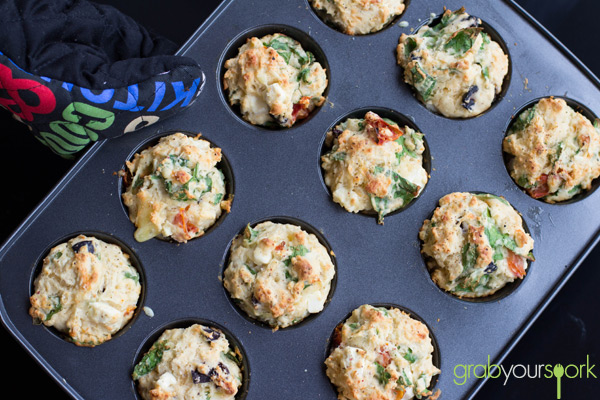
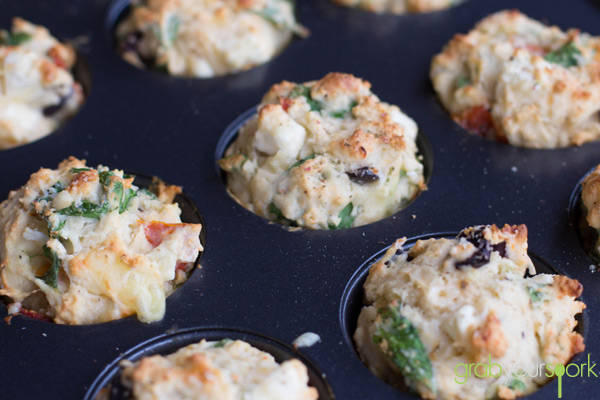
healthy savoury muffins in Tin

Savoury Muffins in Tin

healthy savoury muffins recipe

Vegetable savoury muffin baking tips

Like all baking practice and precision with measurement makes perfect! However, try these helpful tips to make your vegetable savoury muffins turn out on the first attempt.

Its important that when you wash your baby spinach leaves you remove as much excess water as possible. Running your spinach through a salad spinner is a good way to do this. Alternatively placing the spinach on paper towel and gently drying will work.

Don’t over stir the savoury muffin mixture. Resist the temptation to over beat your batter as this will cause your savoury muffins to become touch. You want the final mixture to be lumpy in texture. It should only take 10-12 strokes with a wooden spoon to blend your mixture.

Don’t skimp of the vegetables. If you don’t like on of the veggies, don’t just leave it out but instead replace it with an alternative.

Thoroughly grease the muffin tin before adding the batter. They tend to turn out better without paper cases or muffin cups. We recommend that you spray the pan with canola oil however you also could use olive oil.

Keep an eye on the baking time. Because of the variation in the water content in your ingredients and because all ovens are different you want to monitor them closely. If you take them out too early your savoury muffins could be uncooked in the middle. Bake them too long and they can become dry. Use a skewer to test your savoury muffins a couple of minutes before the end of the bake. If your skewer comes out clean then they should be perfectly cooked.

How to store your savoury muffins

Once you’ve made such great savoury muffins you will be keen to ensure you get to enjoy them all. While to some that could mean trying to eat as many as soon as possible if you store them properly they can be enjoyed over a longer period of time. These are our tips for storing muffins;

Leave your savoury muffins for around 3-5mins after cooking to allow them to firm up before you transfer to a cooling rack.

The muffins you don’t eat warm, ensure they cool completely on a wire rack. Storing your muffins when they are even a little bit warm will result in condensation which you need to avoid, or you will be left with soggy muffins.

Depending on how many muffins you have made you may either want to store dry, refrigerate or freeze your muffins.

We always like to freeze savoury muffins, its such a great way to store them and if they are properly frozen they will be good for at least 2 months (but will remain safe well past then). For best quality we like to individually wrap muffins in clingfilm and then transfer them into containers or Ziplock freezer bags. To reheat – just pop them out of the freezer and place them back in the muffin tin. Reheat at 170c (350f) until heated through. Alternatively, allow them to thaw and reheat them in the microwave.

You can refrigerate them muffins, however this tends to alter the texture of the muffin and we don’t recommend this.

Storing muffins at room temperature is better than refrigeration when it comes to retaining the quality of the flavour. The best way to store them is to line an air tight container with kitchen paper, and place them on top, if you have two layers worth then add another sheet of baking paper in between before seeling the lid. The paper should help to avoid any moisture build up. If you live in a warm climate I recommend only storing for a day or 2 at room temperature. Make sure you freeze them if you don’t think they will be gone in 2 days

Savoury muffins recipe instructions

4.7 from 3 reviews
Savoury Muffins
 
Prep time
Cook time
Total time
 
Yummy savoury muffins with Kalamata olives, semi sun-dried tomatoes, spinach and feta and more.
Author:
Recipe type: Baked Goods
Cuisine: Australian
Serves: 12
Ingredients
  • 2½ cups self-raising flour
  • ½ bunch spinach
  • 150g feta cheese
  • ½ cup semi-sundried tomatoes
  • ¼ cup Kalamata sliced olives
  • 2tbspn parmesan
  • 1⅓ cup milk
  • 50g melted butter
  • 1 egg
Instructions
  1. Preheat oven to 200c and brush a 12 muffin pan with canola oil.
  2. Sift the flour into a large bowl. Add shredded spinach, crumbled feta cheese, chopped sundried tomatoes, olives, parmesan and stir to combine. Whisk together the melted butter, milk and egg until just combined and add to the dry ingredients. Mix together.
  3. Spoon mixture into prepared pans. Bake for 20 minutes. Turn onto a wire rack to cool. Serve warm with some butter or avocado if you prefer. Yum!
Notes
You can easily change the filling to whatever you like – bacon, corn, asparagus, fresh tomato etc.


Melting Moments with Jam

Last Updated on April 8, 2016 by Grab Your Spork

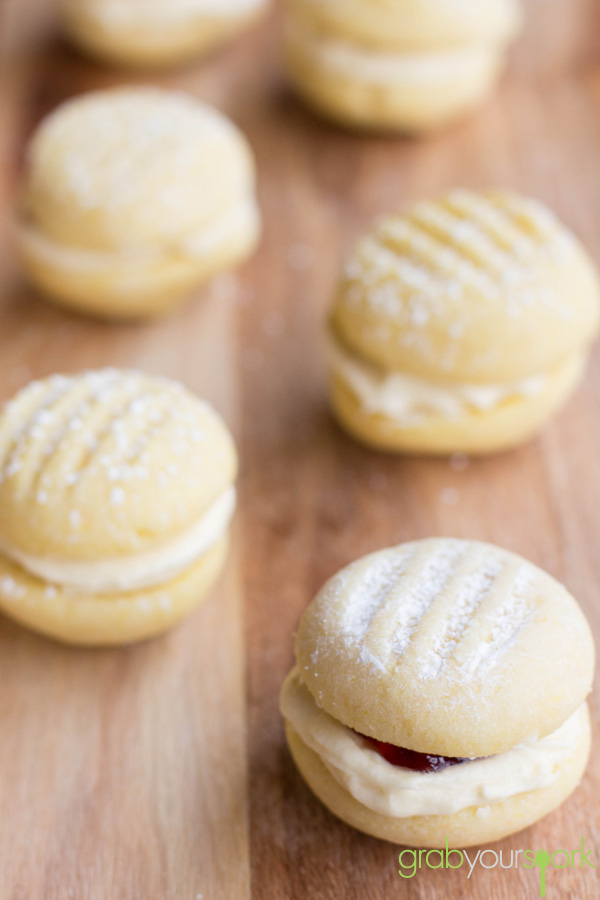
Melting moments, which are also known as yo-yo biscuits, and are a shortbread-like biscuit. The traditional biscuits are then sandwiched together using a simple buttercream, and with our recipe with the addition of jam to make these delicious melting moments with jam.

Don’t let the amount of butter scare you off, these tasty biscuits have a light, fragile and crumbly texture that as the name says simply melt in your mouth. This traditional biscuit is perfect for a morning or afternoon tea.

There are a few variations for melting moment recipes, however this recipe will give you exactly 15 biscuits. The addition of custard powered in this recipe also gives the biscuits a nice even colour and sweetness. When choosing your jam, I prefer it to have a slight tartness like raspberry or plum. However, you can use any flavour you want or even not include jam.

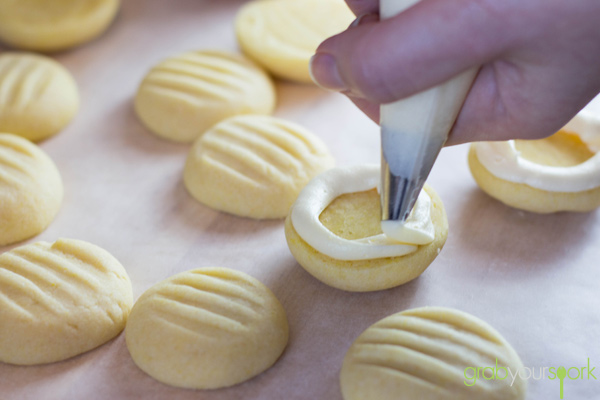
To ensure an even bake and colour, it is also advised you bake the biscuits on a low temperature and for a longer time. This should ensure the biscuits don’t brown around the edges, and a uniform colour across the bottom. Another trick Brooke has also picked up along the way, is to pipe the buttercream around the edge of the biscuit before filling it with jammy goodness.

These melting moments with jam biscuits sure are an oldie but a goodie!

If you like biscuits and cookies then try some other tasty treats including our oatmeal and raisin cookies, ginger nut biscuits or florentine biscuits.

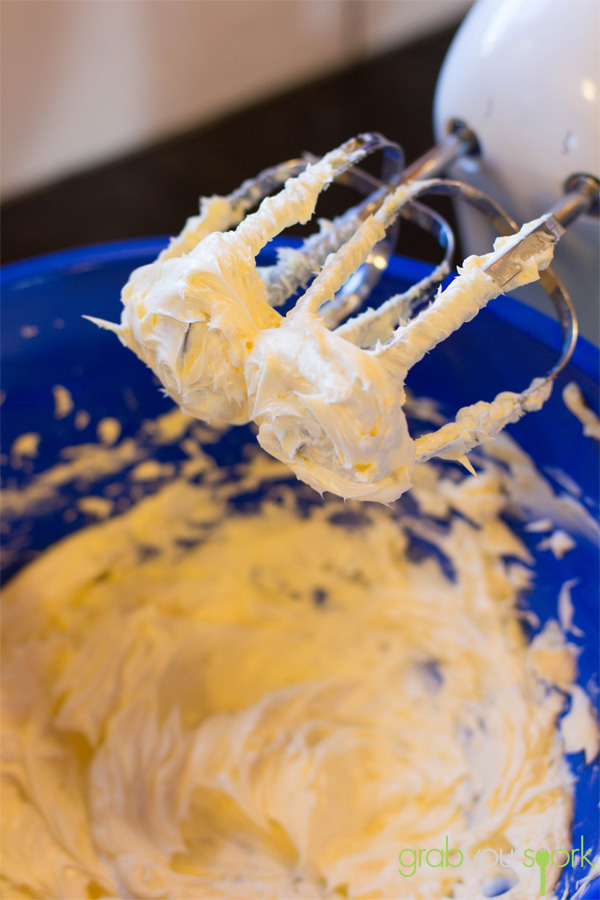
Melting Moments Whipped Butter

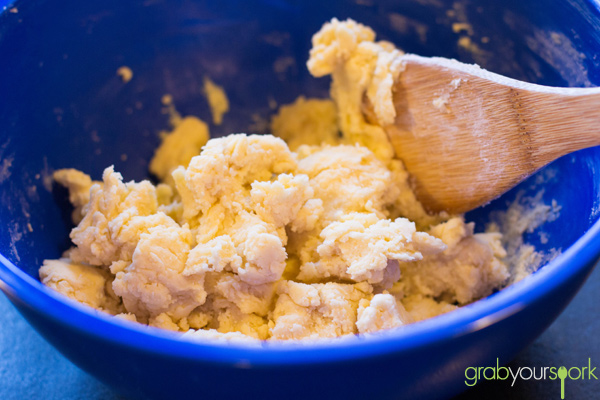
Melting Moments Dough

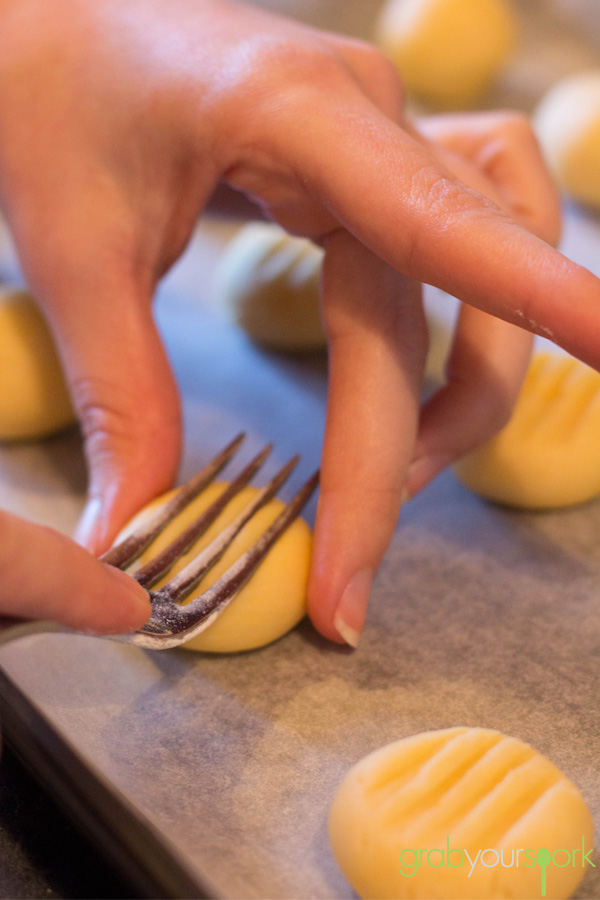
Melting Moments Marking with Fork

Melting Moments Piping Buttercream

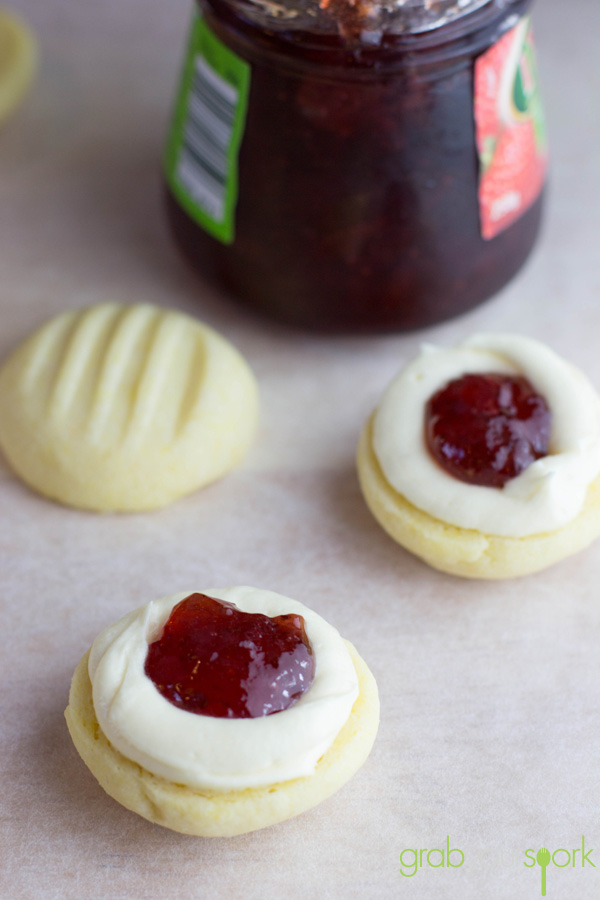
Assembling Melting Moments with Jam

Melting Moments with Jam

Melting moments with jam – Recipe Instructions

Melting Moments with Jam
 
Prep time
Cook time
Total time
 
Melting Moments are a shortbread-like biscuit. The traditional biscuits are then sandwiched together using a simple buttercream, and with our recipe with the addition of jam!
Author:
Recipe type: Baked Goods
Cuisine: Australian
Serves: 15
Ingredients
Melting Moments
  • 250 g butter, room temperature
  • ½ tsp vanilla bean pasta
  • 250g plain flour
  • 85g icing sugar
  • 40 g custard powder
  • ¼ tsp salt
ButterCream
  • 75g butter, room temperature
  • 150g icing sugar
  • 1 tsp vanilla bean paste
  • pinch salt
  • jam
Instructions
  1. Preheat oven to 160C (140C fan-forced) and line two baking trays
  2. Place the butter and vanilla into a large mixing bowl and beat together until smooth and creamy
  3. Sift the remaining ingredients into the bowl and gently mix together until you form a soft dough (you can use a wooden spoon or your hands).
  4. Using your hands roll the dough into small balls, and place onto the prepared trays ensuring you leave an inch or two between each ball.
  5. Using a fork, press the fork onto the centre of each biscuit leaving an indent.
  6. Bake the biscuits in the preheated oven for 20 - 25 minutes.
  7. Allow to cool on baking trays for five minutes before transferring to a wire rack to cool completely. Whilst the biscuits are cooling, make the buttercream.
  8. Place the butter into a large bowl and beat together until smooth and creamy, then slowly add in the icing sugar little at a time, beating until fully combined. Once you have added all the sugar add the vanilla and salt and beat together until light and fluffy.
  9. To assemble the biscuits, place the buttercream in a piping bag and pipe a circle of buttercream around the edges of half the biscuits. Fill the hole with some jam and top with a second biscuit.
  10. These will keep well for around three to four days in an airtight container.
Notes
Brooke likes to pair her biscuits before filling to ensure an even fit.


Roasted Pumpkin and Sweet Potato Soup

Last Updated on September 14, 2019 by Grab Your Spork

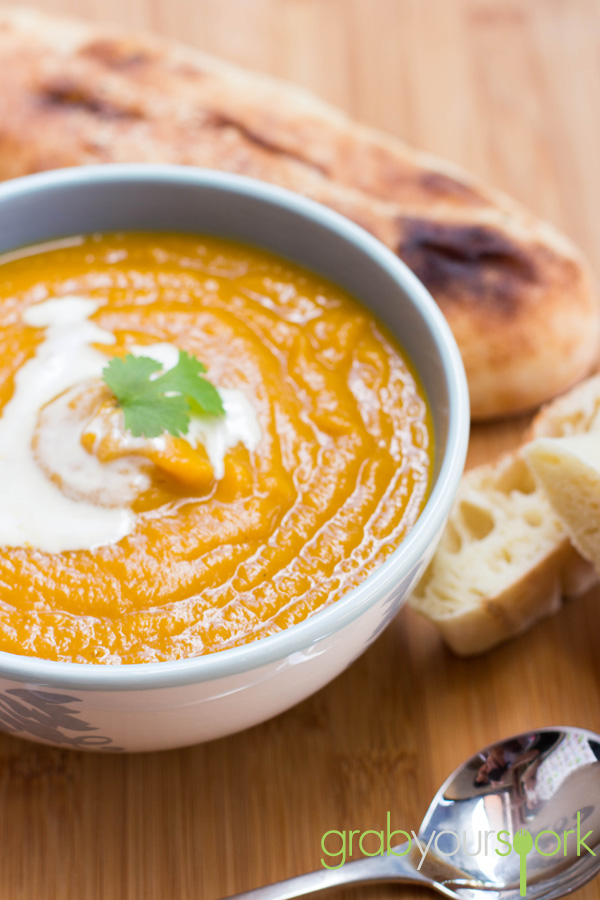
Pumpkin soup has got to be up there with some of the tastiest foods ever (and something Brooke would eat every day if she could). When winter rolls around, the cravings for soup inadvertently comes with it (not that winter is overly cold in Perth). With the barometer dropping to a freezing (16 degrees Celsius) in Perth, we braved the chilling conditions to visit a local farmers market to collect the necessary ingredients for Brooke’s roasted pumpkin and sweet potato soup recipe.

This delicious recipe is so simple, plus it has some easy steps that save you some time and add loads of flavour.

This flavour-packed soup is adapted from a Donna Hay recipe and it is roasting the pumpkin and sweet potato first that I think makes this recipe so good.

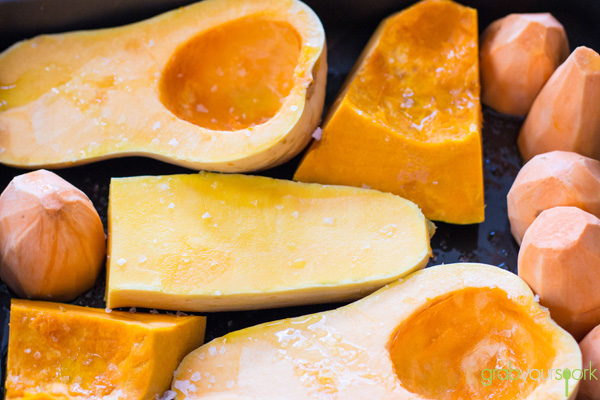
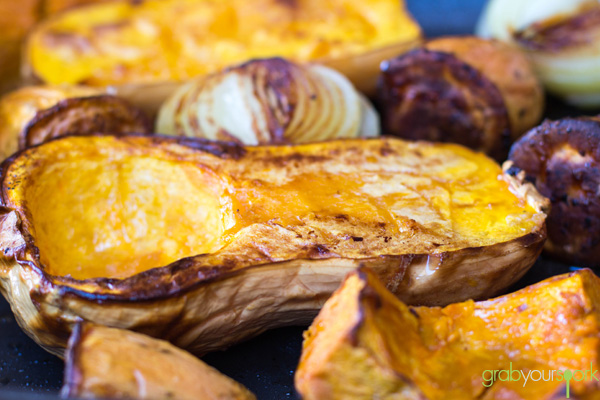
A tip when you are roasting your vegetables. You will know the pumpkin and sweet potato is done when the pumpkin has caramelised and is soft enough to scoop away from the skin. If you think your sweet potato has cooked faster then your pumpkin, don’t stress. Just remove from the pan and keep to the side while the pumpkin remains cooking.

If you wish to season the soup, following Brooke’s family recipe, she likes to season with Clive of India curry powder. Other alternatives are nutmeg or cumin, or simply leave just how it is! This roasted pumpkin and sweet potato soup recipe is a must for winter lunches or dinners.

If your looking another soup recipe to try then why not give our Creamy Cauliflower Soup Recipe a go or our Healthy Vegetarian Zucchini Soup Recipe

Pumpkin and Sweet Potato

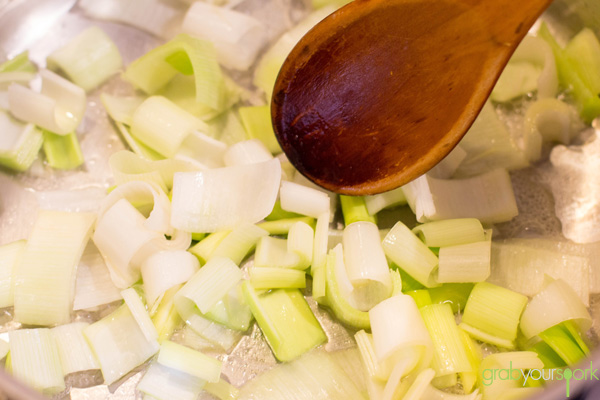
sautéed leeks

Roasted Pumpkin and Sweet Potato Soup Ingredients

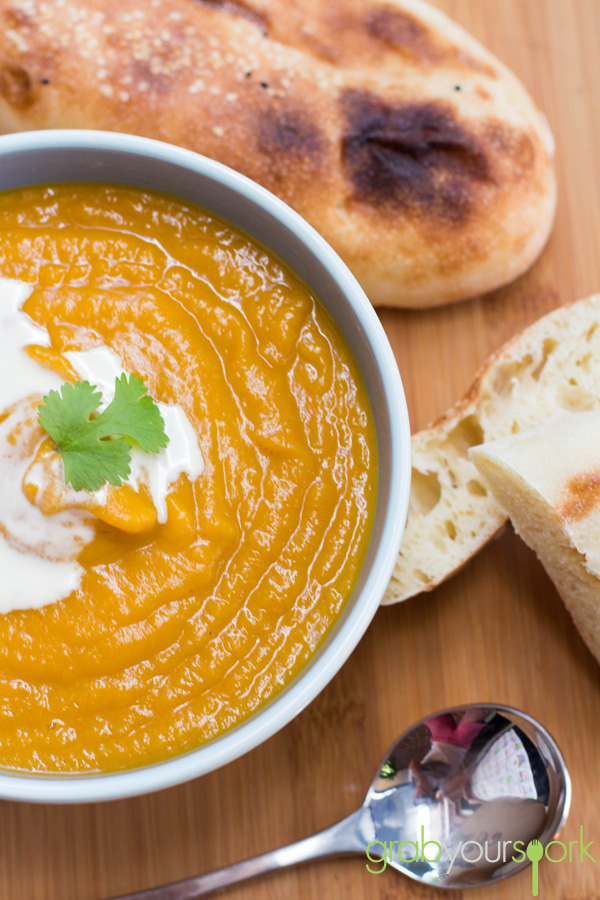
Roasted Pumpkin and Sweet Potato Soup

Roasted Pumpkin and Sweet Potato Soup

Roasted pumpkin and sweet potato soup – Recipe Instructions

5.0 from 2 reviews
Roasted Pumpkin and Sweet Potato Soup
 
Prep time
Cook time
Total time
 
This delicious recipe is so simple, plus it has some easy steps that save you some time and add loads of flavour.
Author:
Recipe type: Soup
Cuisine: Australian
Serves: 4
Ingredients
  • 1Kg butternut pumpkin (left in half)
  • 500g kabocha pumpkin (Japanese pumpkin)
  • 500g sweet potato
  • 1 onion
  • 1 leek
  • olive oil, for drizzling
  • sea salt
  • 3 ½ cups (875ml) chicken stock
  • 1 tablespoon honey
  • 1 tablespoon curry powder
  • cream to serve
Instructions
  1. Preheat oven to 220°C (425°F).
  2. If the pumpkin is whole, cut the pumpkin in half (lengthways) and scoop out the seeds.
  3. Peel the sweet potato, and cut into large chunks
  4. Place the pumpkin and sweet potato and a halved onion in a roasting pan. Be sure to cook the pumpkin skin side down.
  5. Drizzle with a little oil and sprinkle with salt.
  6. Bake for 55–60 minutes or until the pumpkin and sweet potato is just soft and starting to brown.
  7. While the roasted vegetables cool down, you can slice the leek into 1 centimetre rings, and wash thoroughly.
  8. Before you cook the leeks, you can begin to scoop the roasted pumpkin away from the skin. Add to the leeks once they are sautéed.
  9. After heating a large pot you can sauté the leek with a drizzle of olive oil.
  10. Once the leeks are soft, you can add the roasted pumpkin and sweet potato to the pot.
  11. Add 1 cup of the chicken stock at a time and blend until smooth.
  12. Once the vegetables have broken down and cooled slightly, you can blend the soup in a blender or just use a stick blender.
  13. Pour the mixture back into a saucepan, add remaining stock if required
  14. Season the soup with curry powder and add honey.
  15. Place over medium heat until soup is heated through.
  16. Serve with a dash of cream.
Notes
I would recommend blending the soup in the pot using a stick blender (bar mix) to avoid more washing up.